With all the activity we had this weekend and the little things that pop up with building a plane I didn't as much done as I would have liked.
My goal was to get the elevator control horn put together. The control horn is a critical piece because it connects to the control stick and elevator. This makes the plane go up and down which is a handy feature to have when your flying.
The black piece of steel in the picture requires up-drilling from 3/32 to 1/8" (or for those following along that's from a #40 to a #30 bit). Well it's hard to do if you don't have the right drill bits or don't know what you are doing. I ruined one of my good #30 bits by drilling too fast and got the bit super hot which dulls the blades. So I got one of my cheapo bits and slowed down but it wasn't cutting and I put too much pressure on it and the bit broke which caused me to nick in the steel plate. Man... that was not cool!!! I then went to Home Depot and bought a couple of nice cobalt bits made for steel. Oh geez what a difference the right tools make.

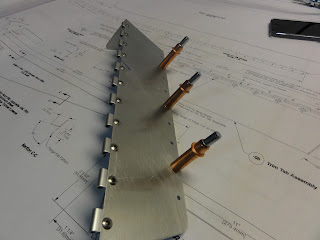
The control horn requires 4 flush rivets along with the other 30 standard rivets that attach the two ribs. The rivet on the left is a standard blind rivet and the other is a flush rivet. A flush rivet sits flat with the surface. This requires the material to be countersunk to make room for the "cone" on the bottom of the rivet. Sounds great but how do I countersink a piece of steel? I called my friend Scott which told me how to do it and he has a micorset tool that he is going to let me borrow. I'm going to pick it up tomorrow at our monthly EAA (Experimental Aircraft Assoication) chapter 868 meeting which will be at David Hahn's hanger he's building a Van's RV-7. Good place to get some advice.


To make some progress I polished some pieces that will be visible on the plane. Pictured is the initial polishing I still need two additional steps before they are complete. It's similar to sanding wood you start with rough sandpaper and move your way down to finer and finer grit sandpaper. In this case, the polish I started with is gritty Nuvite F9 polish its rough but still puts on a nice shine. Next steps require the C and S grade polish. I got the F9 from Bob which he had left over from his plane he only uses the S grade polish now. I need to replace the F9 with some S grade polish which I'll pick up at
Oshkosh. However I had to go pick up some material before I could start. I needed a small palm polisher, wool pads, microfiber cloths and mineral sprites. Going to pick up all this stuff took a few hours on Saturday.
I replaced the table top today which I was planning on doing because the table wasn't completely flat. Assembling the large parts requires a flat work bench (talk about an adventure try flying a crooked airplane). The table had a high spot in the frame which caused a 1/8" dip in the old table top and was little wavy. I took the old OSB top off and fixed the high spot in the frame however I still couldn't get the top to sit flat. Frustrated and tired of all the splinters in my hands I decided to go get some 3/4" particle board. Wow what a difference. There's one little spot that's about 1/16" off other than that the table is perfectly flat and level.
All the little things add up. The wrong drill bit, the tool to countersink steel, having the polish and no supplies to polish with and a 1/8" dip in the table. Hopefully I'll get all this little stuff taking care of and get to building a plane....
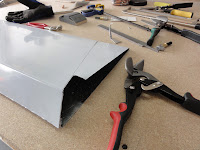
 I made some progress on the control horn and elevator. The flush rivet holes are countersunk on the control horn (that was a pain). I tackled cutting the elevators The cuts are tricky and I was about as nervous as a cat in a room full of rocking chairs. It's hard to see but there's a slight angle along the edge of the cut (offset by 29/64" to be exact). I lost count how many times I re-checked the measurements before the first cut. I'm glad it's over, it was a nice confidence booster.


.JPG)


